
Before you can create email addresses like info@yourbusiness.pk, your domain must be connected to your HostBring email. You do this once, in the client portal.
NoteDid you buy your domain from HostBring, or did our team set up its DNS? Then it's already connected and you can skip this guide. Go straight to Create your first email address.
Add your domain
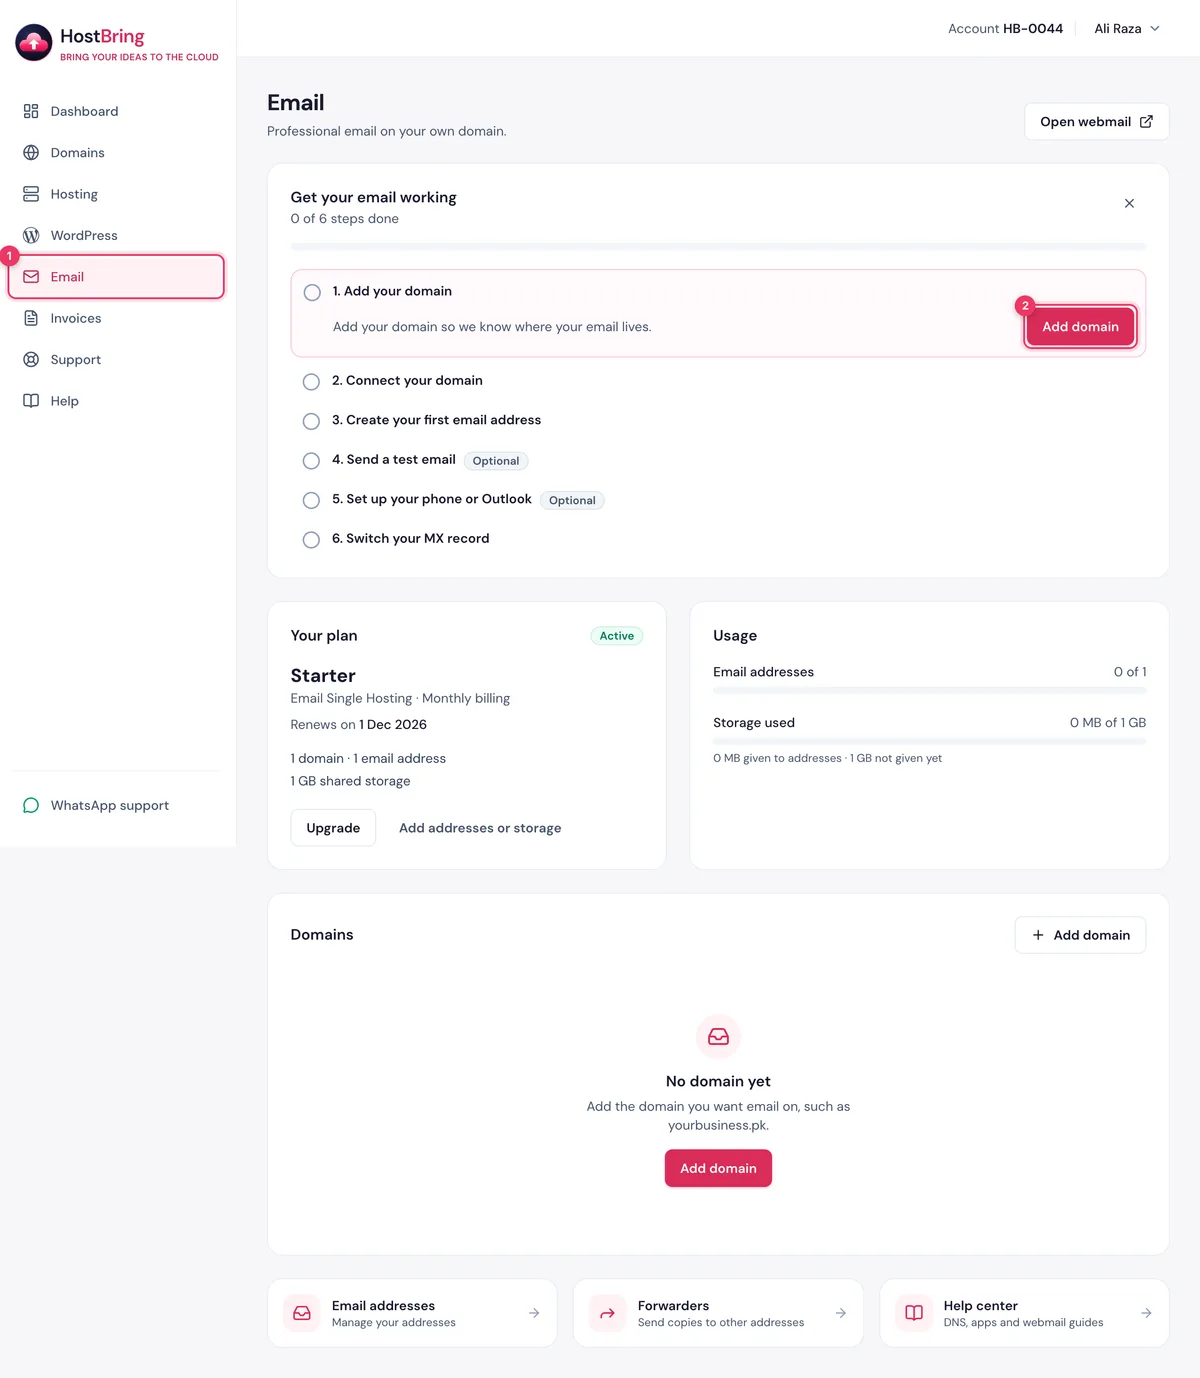
- Log in at my.hostbring.com. First time? Choose your password from the invite email: see Log in to the client portal.
- Click Email in the menu.
- In Get your email working, next to 1. Add your domain, click Add domain.
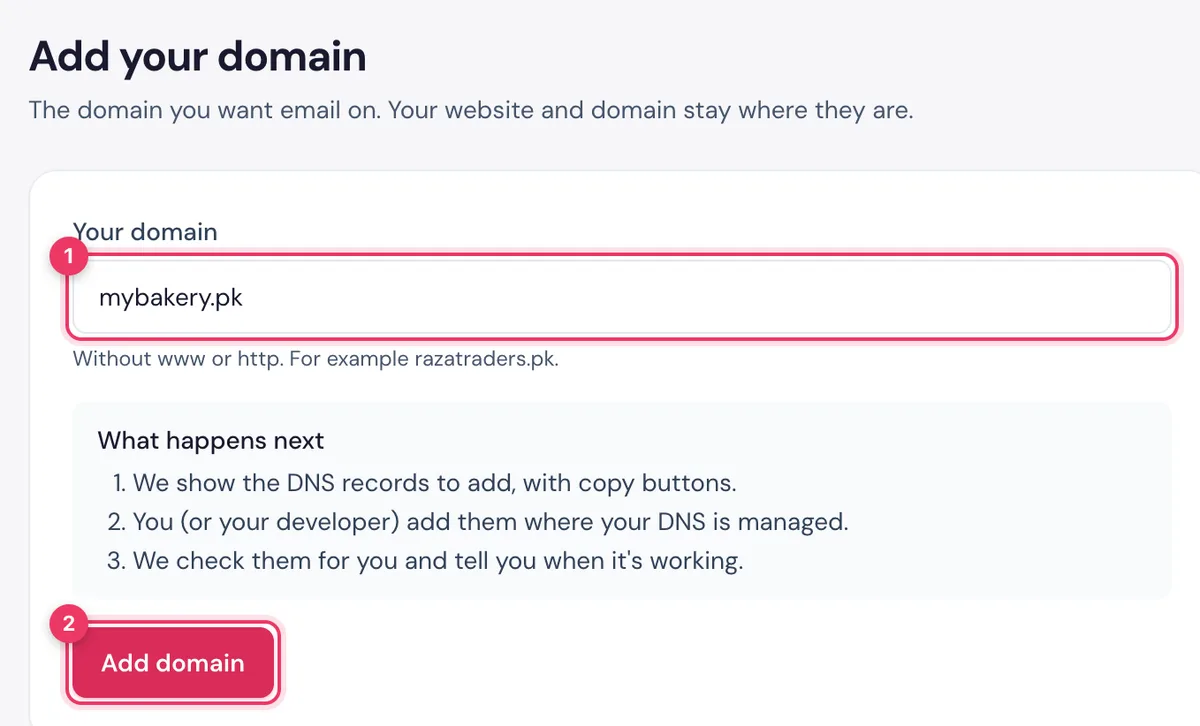
- Type your domain without www or http, for example
mybakery.pk. - Click Add domain.
Choose how to connect it
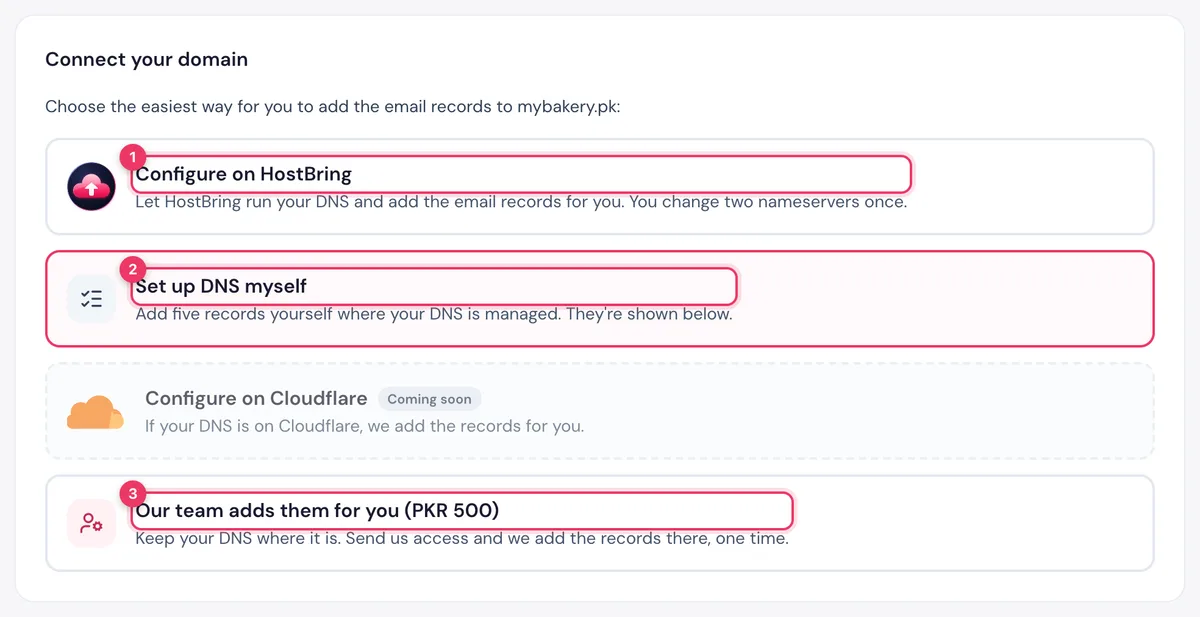
Your domain's page opens with Connect your domain. Pick the easiest way for you:
- Configure on HostBring (easiest): you change two nameservers once, and we add all the email records for you. See step 3.
- Set up DNS myself: you add the records yourself where your DNS is managed. See step 4.
- Our team adds them for you: keep your DNS where it is. Send us access and our team adds the records for you (a one-time charge).
Configure on HostBring: change your nameservers
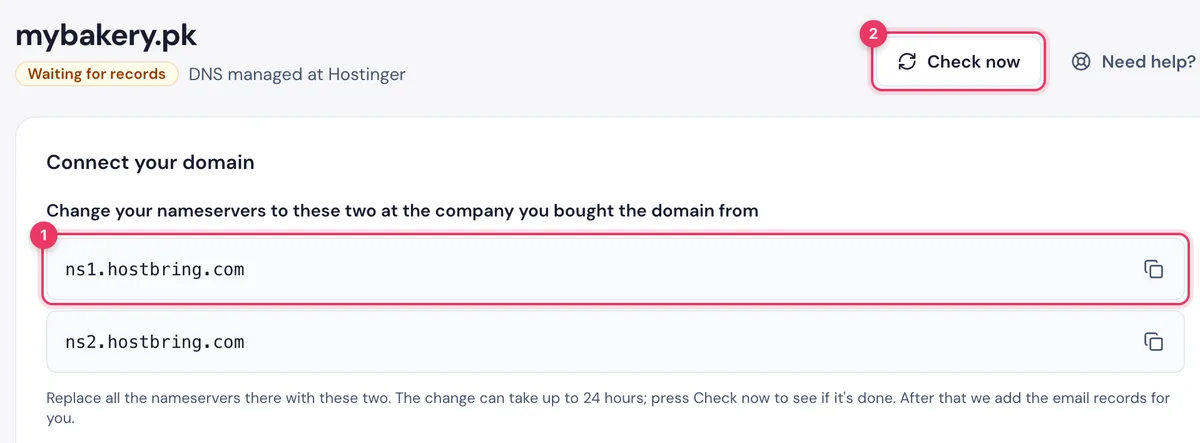
- Click Configure on HostBring. You see two nameservers, each with a copy button.
- Log in where you bought your domain (GoDaddy, Namecheap, PKNIC and others) and replace all its nameservers with these two. Step by step for each company: Connect your domain with HostBring DNS.
- Back in the portal, click Check now. The change can take up to 24 hours. After that we add the email records for you, and you don't need to add anything yourself.
ImportantIs your website hosted somewhere else? Before changing the nameservers, click Need help? on the page and tell us, so your website keeps working.
Set up DNS myself: add the records
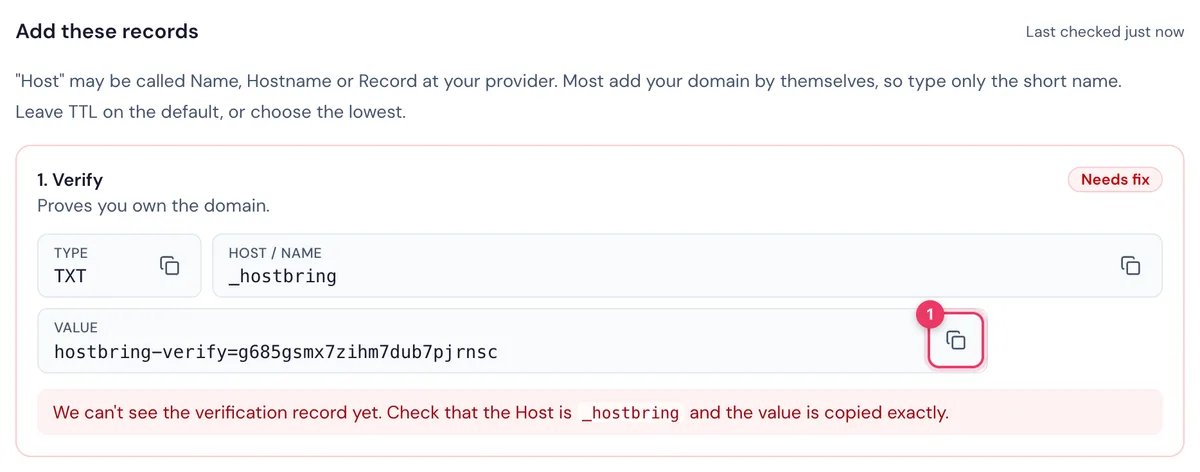
- Click Set up DNS myself. Under Add these records, you see each record with its Type, Host and Value.
- Copy each one with its copy button and add it where your DNS is managed. Not sure where that is? See Who manages my DNS?. There are step-by-step guides for GoDaddy, Namecheap, Hostinger, Cloudflare, cPanel and other providers.
- We check your records every few minutes. Each one shows Done when we can see it. You can also click Check now.
TipSomeone else manages your DNS? Click Send to my developer to share the records with them in one link.
Next: create your first address
When your domain shows Verified, you're ready: Create your first email address.
The MX record comes last, after your addresses are ready (and your old email is moved, if you need it). The portal unlocks it for you at the right time, so no email is lost.
